Ready to create your own branded paper cups or packaging?
Tell us your requirements — size, coating, printing, and destination — and our team will prepare a detailed quotation within 24 hours.

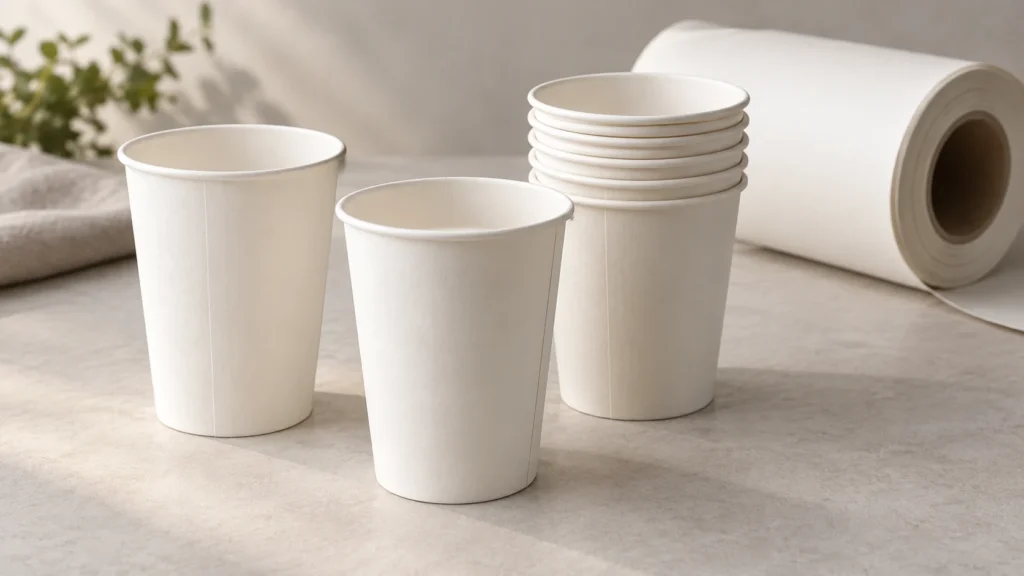
Understanding paper cup manufacturing transforms you from passive buyer to informed quality controller. Production process directly impacts cup performance: seam strength, liquid resistance, structural integrity, and heat insulation. Poor manufacturing (paperboard unsuitable for the design, inadequate coating, weak seams) creates leaks and collapses. Superior manufacturing (quality materials, precise machinery, rigorous QC) supports consistent cup performance.
In this guide, you’ll learn:
•Step-by-step manufacturing process: paperboard to finished cups
•Critical quality control points and inspection criteria
•Machinery specifications and production capacity assessment
•Material quality standards: GSM, coating thickness, sealing specifications
•Common manufacturing defects and prevention strategies
•Factory assessment checklist for supplier evaluation
•Production capacity planning and lead time factors
Quick Takeaway: Paper cup manufacturing involves paperboard inspection, barrier coating, printing, die cutting, cup forming, bottom sealing, rim curling and final inspection. Machine speed, material specifications and acceptance criteria depend on the selected cup and production line. ISO 9001 certification addresses the management system.
Material Arrival and Storage:
•Paperboard arrives in rolls sized for the converting equipment.
•Store paperboard under the supplier’s recommended temperature and humidity conditions.
•Moisture changes can affect paperboard dimensions and mechanical performance.
Paperboard Quality Inspection:
Specifications Checked:
•GSM (grams per square meter): Verify matches order spec (230 GSM, 260 GSM, etc.)
•Thickness uniformity: Check measured caliper against the ordered grade’s tolerance.
•Moisture content: Check against the ordered grade’s specification.
•Visual defects: No tears, holes, discoloration, or foreign objects
•Surface smoothness: Critical for printing quality (roughness measured with Bendtsen tester)
Acceptance Criteria:
•✅ GSM matches the specified grade and agreed tolerance
•✅ Thickness meets the grade’s specified caliper tolerance
•✅ Moisture content meets the grade’s specification
•✅ Visible defects are assessed against the agreed incoming-material acceptance criteria
•✅ Bendtsen surface roughness meets the grade’s specification (lower air-leak readings indicate a smoother surface)
Red Flag: The supplier cannot show incoming-material inspection records or relevant test results.
Purpose: Provide a liquid barrier suited to the cup’s intended contents and conditions of use.
Coating Process (Extrusion coating method):
Step-by-Step:
1.Paperboard unwinds from jumbo roll onto coating machine
2.PE or PLA resin is melted using the resin supplier’s extrusion-coating processing guidance.
3.Molten plastic extruded through thin slot die (creates uniform film)
4.Plastic film pressed onto moving paperboard by chilled roller (bonds and solidifies)
5.Coated paperboard rewound into new jumbo roll
Critical Specifications:
•Coating weight: Specify the polymer and coating mass per unit area for each coated side.
•Coating thickness: Specify separately from coating weight; converting g/m² to thickness requires the coating density.
•Uniformity: Check coating distribution against the agreed material specification.
•Adhesion: Use an agreed test method and acceptance limit for the selected coated board.
•Coverage: Inspect for pinholes, streaks and uneven coating.
Quality Control at This Stage:
•Coating weight: For matched 100 cm² coated and uncoated samples, multiply the mass difference in grams by 100 to estimate total coating weight in g/m² (across all coated sides).
•Adhesion test: Check the agreed specimen preparation, test geometry and acceptance criterion.
•Visual inspection: Check for streaks, pinholes, uneven coverage with backlight
•Water absorption test: Use a specified Cobb method, exposure time and acceptance value for the selected board.
Common Defects:
•Uneven coating (streaks or bands): Extruder die misaligned or clogged
•Pinholes: Contamination in resin or air bubbles during extrusion
•Poor adhesion: Incorrect extrusion temperature or paperboard surface contamination
•Flexographic printing: Evaluate the press speed for the actual web or sheet layout.
•Offset printing: Evaluate the sheet format, impressions per hour and blanks per sheet.
•Digital printing: Evaluate the selected press and artwork requirements.
Quality Control for Printing:
•Color accuracy: Compare the approved reference using an agreed color-difference method and tolerance.
•Registration: Check color and artwork alignment against the agreed print specification.
•Ink adhesion: Rub test (ink shouldn’t smudge or flake when rubbed)
•Print sharpness: Text edges should be crisp, not blurred or feathered
Inspection Frequency: Check at intervals set in the print-quality plan (catch and correct issues immediately)
Example sheet-fed process: Paperboard sheets are cut into cup blanks; other lines can use roll-fed stock.
Die Cutting Operation:
1.Printed/coated paperboard sheets fed into die-cutting machine
2.Steel rule die (cutting template) presses down on sheet
3.Blank shape cut out (curved, sector-shaped blank for a tapered cup)
4.Waste material (scrap) removed and sent to a recycling route that accepts the material
5.Blanks stacked and transferred to cup forming machines
Critical Dimensions:
•Blank dimensions: Match the approved dieline for the cup geometry and side-seam allowance.
•Blank height: Include the rim and bottom-forming allowances in the approved dieline.
•Dimensional tolerance: Follow the approved tooling and blank specification.
Quality Check:
•Dimensional verification: Measure blank length and height with caliper at the agreed inspection interval
•Edge quality: Clean, sharp cut edges (no ragged edges or incomplete cuts)
Example cup-forming sequence:
Step-by-Step Process:
1.Blank feeding: Automatic feeder picks single blank from stack
2.Blank positioning: Blank placed on forming mandrel (forming mold matched to the cup shape)
3.Wrapping: Blank wrapped around mandrel to form cylindrical/conical shape
4.The blank edges overlap according to the cup’s approved side-seam design.
5.The sealing system activates the compatible coating at the validated machine settings.
6.The seam is clamped for the validated pressure and dwell time.
7.Cup transfer: The formed body proceeds to subsequent forming and sealing stations.
Critical Parameters:
•Production speed: Depends on the machine and cup; the PMC 1003 is rated up to 330 cups/minute.
•Seam overlap: Match the approved cup and tooling design.
•Sealing temperature: Use the validated settings for the coating and machine.
•Sealing pressure: Follow the machine’s validated process settings.
•Alignment: Seam straight and vertical (no diagonal or wavy seams)
Quality Control:
•Seam strength: Record the test geometry and the agreed force limit for the cup design.
•Bond coverage: Inspect for gaps in the sealed overlap.
•Leak testing: Water fill test—seam should not leak (perform at the intervals specified in the quality plan)
Process: Circular bottom disc attached to cup body to complete cup structure
Example bottom-sealing sequence:
1.Bottom stock is fed and formed according to the machine configuration; some machines use web-fed stock.
2.Disc positioning: Disc aligned with bottom opening of cup body
3.Adhesive/heat-seal activation: Bottom disc edge has heat-seal coating or adhesive applied
4.The bottom is heated and sealed using the machine’s validated forming sequence.
5.The formed bottom is allowed to set before subsequent handling.
6.Ejection: Cup ejected from forming station
Critical Specifications:
•Bottom blank size: Match the approved tooling drawing, including the bottom-forming allowance.
•Seal width: Match the approved bottom-seal design.
•Seal strength: Apply the agreed test method and acceptance criteria.
•Seal coverage: 100% around entire circumference (any gap = leak path)
Quality Control:
•Leak testing: Fill cup with water, inspect for leaks at bottom seam (at the agreed sampling interval)
•Bottom flatness: Cup should stand stable on flat surface (no wobbling or tilting)
•Separation test: Measure bottom-seal strength using the agreed specimen preparation and method.
Purpose: Roll cup top edge outward to create smooth, comfortable drinking rim
Rim Curling Process:
1.Cup positioning: Cup placed on curling mandrel
2.The rim is conditioned using the machine settings specified for the material.
3.Curling tools form the rim to the approved profile.
4.Cooling: Curled rim cools and hardens in rolled position
5.Cup completion: Finished cup with curled rim ready for inspection
Critical Parameters:
•Curl size: Follow the approved cup profile and lid design.
•Consistency: Measure rim dimensions against the approved tolerance.
•Rim smoothness: No sharp edges or deformations
Quality Control:
•Visual and tactile: Run finger around rim—should feel smooth, no sharp spots
•Dimensional check: Measure curl width at 4 points around rim (at the agreed inspection interval)
•Lid fit: Test the cup with the supplier’s specified compatible lid model.
Final Quality Inspection:
Inspection Points (visual and functional):
1.Structural integrity: No cracks, deformations, or collapsed sections
2.Seam quality: Straight, tight seam with no visible gaps
3.Bottom seal: No leaks, bottom flat and well-bonded
4.Rim quality: Smooth curl, no sharp edges, uniform diameter
5.Coating quality: No pinholes, delamination, or thin spots
6.Printing quality (if custom): Sharp, aligned, correct colors
7.Cleanliness: No contamination, dust, or foreign materials
Sampling Rate:
•Routine inspection: Set process checks and lot-acceptance sampling in the agreed quality plan.
•Higher-risk orders: Adjust inspection intensity according to the agreed risk assessment.
Acceptance Criteria:
•Major defects (leaks, collapse): Define acceptance and rejection rules in the quality agreement.
•Minor defects (cosmetic): Define classifications and acceptance rules separately.
Packaging Process:
1.Cup nesting: Cups stacked inside each other (a specified number of cups per sleeve)
2.Sleeve wrapping: Clear plastic film wrapped around nested stack
3.Carton packing: the specified sleeve and cup count per carton
4.Carton sealing: Carton sealed with tape, labeled with specifications
5.Pallet loading: Cartons stacked on pallets
Quality Preservation:
•Moisture protection: Sealed plastic sleeves and cartons (helps protect against moisture exposure)
•Stack cartons within the packaging supplier’s load and stacking limits.
•Store finished goods under the supplier’s recommended conditions.
GSM specifications: Grammage is mass per unit area; select the grade for the actual cup design.
Testing Methodology:
•GSM measurement: Cut 100 cm² sample, weigh on precision scale, calculate: (weight in grams ÷ 100) × 10,000 = GSM
•Acceptance tolerance: Follow the ordered grade; for an explicitly agreed ±5% tolerance, 230 GSM corresponds to 218.5–241.5 GSM.
•Sampling: Test at the agreed roll-sampling interval during production
Caliper specification:
•Grammage and caliper must be read separately on the material specification.
Moisture Content:
•Target moisture: Use the selected paperboard grade’s specified value and tolerance.
•Too dry: Brittle, cracks during forming
•Too wet: Weak structure, coating adhesion problems, mold growth in storage
PE/PLA Coating Specifications:
Coating weight selection: Specify polymer, coated side and intended food-contact conditions.
Testing Methods:
•Weight method: For matched 100 cm² coated and uncoated samples, coating mass difference in grams × 100 = estimated total coating weight in g/m² (across all coated sides).
•Thickness gauge: Micrometer measurement before and after coating
Liquid Barrier Performance:
•Cobb test: State the test method, exposure time and agreed water-absorption limit.
•Liquid resistance: Test the finished cup under its specified use conditions.
•Grease resistance: Specify a test method and acceptance criterion suited to the material and contents, including for food containers.
Adhesion Strength:
•T-peel test: Use the specified T-shaped specimen geometry for flexible adherends and report the test conditions and measured force.
•Temperature resistance: Verify coating adhesion under the finished cup’s rated use conditions.
Seam Specifications:
Seam overlap: Use the approved tooling dimensions and inspect the completed bond.
Bonding Method:
•Heat sealing: Select process settings for the coating and machine.
•Or water-based adhesive applied to one edge where the cup design requires an adhesive
Seam strength testing: Agree on specimen geometry, test procedure and acceptance force for the cup.
Example seam check using room-temperature water:
1.Fill the cup with room-temperature water to the agreed test fill level.
2.Inspect seam area for immediate leaking (should be zero)
3.Let stand for the agreed observation period, then inspect again and record any seepage.
4.Gently squeeze cup (simulating hand grip), check for leaks
5.Sample check: Record any leakage at the seam
Sampling Rate: Test the sample size specified in the quality plan during production (destructive testing on samples).
Curl Specifications:
Dimensions:
•Curl width: Check the specified rim profile for the cup and lid combination.
•Diameter tolerance: Check against the approved cup drawing.
•Lid compatibility: Match the cup and lid models; for example, BioPak offers both 80mm and 90mm 12oz cups.
Surface Quality:
•Smooth to touch (no sharp edges, rough spots, or tears)
•Coating intact on rim without visible damage
•No deformation or flat spots (rim should be within the specified roundness tolerance)
Lid Compatibility Testing:
•Fit test: Fit the manufacturer’s compatible lid according to its instructions.
•Lid sealed on rim shouldn’t rock or have gaps
•Test with compatible lids on cups sampled under the inspection plan (verify consistency)
1. Coating Machine (PE/PLA Extrusion Coating Line):
Specifications:
•Production speed: Confirm the specified web speed with the selected coating and coat weight.
•Width capacity: Match the coater to the purchased reel width.
•Coating weight range: Check the selected coater and resin combination.
•Cooling section: Check the line layout and available floor space.
2. Printing Machine (Flexographic Press):
Specifications:
•Production speed: Confirm the press specification and actual print job.
•Printing width: Match the web or sheet format.
•Color stations: Confirm the number required by the artwork.
•Registration accuracy: Agree on a measurable print tolerance.
3. Die Cutting Machine:
Specifications:
•Production speed: Check sheets or web length per minute and blanks per layout.
•Cutting capacity: Match the press and tooling to the material.
•Sheet size: Confirm the cutter’s supported format.
4. Cup Forming Machine (Most Critical Equipment):
Specifications:
•Production speed: Check the actual machine model and cup configuration.
•Automation level: Confirm which feeding, forming, sealing, curling and ejection steps are automatic.
Worked capacity example with assumed speed, efficiency and shifts:
•Machine speed: 100 cups/minute
•Operating efficiency: 85% (accounting for material loading, minor stops)
•Effective production: 100 × 0.85 = 85 cups/minute
•8-hour shift: 85 × 60 × 8 = 40,800 cups/shift
•20 working days: 40,800 × 20 = 816,000 cups/month per machine
5. Inspection and Packaging Line:
Specifications:
•Inspection speed: Match inspection capacity to the production line.
•Packaging speed: Confirm capacity for the selected pack format.
•Automation: Confirm which stacking, wrapping and sealing tasks are automatic.
How to Evaluate Supplier Production Capacity:
Questions to Ask Suppliers:
Capacity examples using the preceding one-shift assumptions:
10–20 cup forming machines:
•Monthly output: Approximately 8–16 million cups under the preceding example assumptions.
30–50 cup forming machines:
•Monthly output: Approximately 24–40 million cups under the preceding example assumptions.
100 or more cup forming machines:
•Monthly output: Approximately 80 million cups or more under the preceding example assumptions.
Critical Insight: More machines ≠ better quality. Focus on equipment condition, maintenance practices, and QC protocols over sheer machine count.
Manifestation: Liquid seeps through cup body seam, causing drips or complete failure
Root Causes:
•Insufficient seam overlap
•Incomplete heat-seal activation (temperature too low or exposure time too short)
•Misalignment during forming (seam edges don’t contact properly)
•Contamination on seam surfaces (dust, oil prevents bonding)
Prevention Strategies:
•Set seam overlap to the approved tooling specification.
•Calibrate the sealing system using the machine and coating supplier’s procedure.
•Set pressure according to the validated sealing process.
•Clean forming equipment according to the cleaning schedule (remove dust and coating residue)
•Seam strength testing: Follow the agreed sample plan, specimen geometry and acceptance force.
Acceptable Defect Rate: Define the sampling and acceptance rules in the quality agreement.
Manifestation: Liquid leaks at bottom seam where disc meets cup body
Root Causes:
•Bottom disc misalignment (not centered, creating gaps)
•Insufficient adhesive or heat-seal coating on disc edge
•Uneven pressure during bottom sealing (some areas not bonded)
•Bottom disc diameter mismatch (too small or too large for cup body)
Prevention Strategies:
•Automated disc feeding with alignment checks
•Check bottom-seal pressure against the validated process settings.
•Check sealing time against the validated process settings.
•Check the bottom blank against the approved tooling dimensions.
•Water leak testing: Use the agreed sample plan, fill conditions and observation period.
Acceptable Defect Rate: Define the sampling and acceptance rules in the quality agreement.
Manifestation: Cup walls collapse when filled, or arrive crushed from shipping
Root Causes:
•Material: Paperboard stiffness or strength unsuitable for the cup design
•Moisture: Excessive humidity exposure (softens paperboard, reduces strength)
•Packaging: Overstacked during storage/shipping (crushing bottom layers)
•Forming: Improper forming temperature or pressure (weak cup body structure)
Prevention Strategies:
•Use the paperboard grade specified for the cup design and intended service.
•Storage: Follow the material supplier’s humidity recommendations.
•Packaging limits: Follow the approved carton and pallet stacking limits.
•Structural strength testing: Fill cup with rated volume, should stand without deformation
•Compression testing: Use the agreed loading method and acceptance criterion.
Acceptable Defect Rate: Define the sampling and acceptance rules in the quality agreement.
Manifestation: Uncomfortable drinking rim, lid won’t fit properly, or rim visually uneven
Root Causes:
•Rim curling rollers worn or misaligned
•Insufficient heating during curling (rim doesn’t soften properly)
•Variable paperboard thickness (causes uneven curling)
•Excessive curling speed (inconsistent results)
Prevention Strategies:
•Regular roller maintenance: Inspect and replace tooling according to condition and the maintenance schedule.
•Check rim-heating settings against the machine’s validated process.
•Rim diameter inspection: Measure at several points and compare with the approved tolerance.
•Tactile inspection: Run finger around rim on samples—should feel uniformly smooth
•Lid fit testing: Check the specified cup and lid combination; investigate any fit failures.
Acceptable Defect Rate: Define the sampling and acceptance rules in the quality agreement.
Manifestation: Liquid seeps through cup walls, or coating peels away from paperboard
Root Causes:
•Pinholes: Contamination in coating resin, air bubbles during extrusion
•Delamination: Inadequate coating temperature, paperboard surface contamination
•Thin spots: Uneven coating application, extruder die issues
Prevention Strategies:
•Filter coating resin (removes contaminants before extrusion)
•Maintain extrusion conditions within the resin supplier’s guidance for the selected equipment.
•Coating weight monitoring: Compare samples with the ordered material specification.
•Adhesion testing: Follow the agreed method, test interval and acceptance criterion.
•Backlight inspection: Visually check coating for pinholes (light transmission reveals defects)
Acceptable Defect Rate: Define the sampling and acceptance rules in the quality agreement.
Physical Facility Assessment:
1. Cleanliness and Organization:
•✅ Clean floors, organized work areas (indicates good management)
•✅ Raw materials stored off floor, protected from moisture (pallets, covered)
•✅ Finished goods in sealed packaging, storage under the supplier’s recommended conditions
•❌ Red Flag: Dusty, cluttered factory with materials exposed to elements
2. Equipment Condition:
•✅ Equipment shown to produce the specified cup consistently
•✅ Well-maintained machines (clean, no visible rust or excessive wear)
•✅ Regular maintenance schedules posted (evidence of preventative maintenance)
•❌ Red Flag: Neglected machinery, visible corrosion or unresolved maintenance problems
3. Climate Control:
•✅ Temperature and humidity monitoring systems visible
•✅ Storage controls suited to the materials, including dehumidification where needed
•✅ Temperature and humidity readings consistent with the material supplier’s storage instructions
•❌ Red Flag: Materials exposed to moisture or stored contrary to the supplier’s instructions
4. Quality Control Lab:
•✅ Dedicated QC area with testing equipment (scales, calipers, pull testers, leak test stations)
•✅ Documentation of QC protocols and testing records
•✅ Trained QC personnel with defined inspection responsibilities
•❌ Red Flag: No documented inspection plan or relevant test results
Compliance documents and relevant certifications:
Quality Management:
•✅ ISO 9001:2015 (quality management system)—indicates systematic quality controls
•Verify: Request certificate, check expiry date, confirm scope includes paper cup manufacturing
Food Safety:
•✅ FDA compliance: Verify applicable authorizations and conditions for all cup components, including 21 CFR 176.170 where applicable.
•✅ EU food-contact compliance: Check Regulation (EC) No 1935/2004, GMP requirements and applicable material-specific or national rules.
•✅ National requirements: Check the applicable German rules and French food-contact guidance; DGCCRF is a French authority, not a certification.
Environmental (if claiming eco-friendly):
•✅ FSC or PEFC: Verify the actual chain-of-custody and product claim.
•✅ BPI certified: Verify the finished cup’s actual certification and the disposal conditions covered.
•✅ ISO 14001 (environmental management)—optional but demonstrates environmental commitment
Warning: Always request to see current certification documents — verify certificate numbers online, and check expiry dates.
Capacity Verification Questions:
1. Machine Count and Utilization:
•“How many cup forming machines do you have?” (Stated: 50 machines)
•“What is your current utilization rate?” (request the current figure and order backlog)
•Calculation Check: 50 machines × 100 cups/min × 60 min × 16 hrs (2 shifts) × 22 days = 105.6 million cups/month theoretical
•Capacity at the assumed efficiency: 105.6M × 80% efficiency = 84.48 million cups/month
•Your order: 500,000 cups = 0.6% of monthly capacity (before accounting for committed production and the delivery deadline)
2. Lead Time Realism:
Illustrative planning assumptions for 100,000 cups; confirm each duration with the supplier:
•Order confirmation and payment: 1-2 days
•Material procurement (if not in stock): 3-5 days
•Production scheduling (queue time): 3-7 days
•Production run: 2-4 days (100,000 ÷ 40,000 per day = 2.5 days)
•QC and packaging: 1-2 days
•Shipping preparation: 1-2 days
•Total in-factory time: 11-22 days
•Assumed sea transit for this example: 20–35 days; confirm the actual route and schedule.
•Production plus assumed sea transit: 31–57 days; customs, port delays and inland delivery are additional.
Red Flags:
•A short total lead time that does not account for the chosen shipping route
•Vague timeline: “Around 30-40 days” without dated milestones or an identified shipping route
•Constantly changing estimates without an explained cause or revised milestones
3. Rush Order Capability:
•“Can you expedite production if needed?” (confirm availability and any additional charge)
•“What is your fastest turnaround?” (request a dated production and transport schedule)
Critical inspection points (perform before placing bulk order):
1. Leak testing (most important):
•Fill to the cup’s specified working level using its rated liquid and temperature conditions.
•Use the agreed holding time and test procedure.
•Inspect seam and bottom for any moisture or dripping
•Check handling separately with an empty cup or room-temperature water; do not squeeze a cup containing hot liquid.
•Acceptance: Record any leak or seepage; determine lot acceptance using the agreed sampling and defect criteria.
2. Structural integrity:
•Fill to the specified working volume; nominal ounce size may differ from usable fill.
•Cup should stand without collapsing or deforming
•Rim should remain circular (not warping inward or outward)
•Acceptance: No visible deformation under normal load
3. Rim quality:
•Check the rim of an empty, cooled cup for rough or sharp edges.
•Measure rim diameter at multiple positions and compare with the approved drawing and tolerance.
•Test lid compatibility—specified matching lid should snap on securely
•Acceptance: Smooth feel, consistent diameter, lid fits properly
4. Material thickness:
•Measure wall caliper using the agreed method and locations.
•Grammage (GSM) and caliper are separate grade specifications; there is no fixed conversion for every 12oz cup.
•Check at multiple points (top, middle, bottom of cup)
•Acceptance: Measured caliper meets the ordered grade’s specified tolerance.
5. Coating quality:
•Check for exterior moisture after the agreed liquid-holding test under the cup’s specified use conditions.
•Check coating adhesion using the agreed specimen preparation and test method.
•Acceptance: Liquid resistance and coating adhesion meet the agreed test criteria.
Use representative samples and an agreed inspection plan before placing a bulk order; a few passing cups do not establish the quality of an entire batch.
Remote verification strategies:
1. Request detailed photos/videos:
•Production line in operation (shows equipment condition and cleanliness)
•QC lab and testing equipment, supported by relevant recent test and calibration records
•Material storage areas, with storage-condition records where temperature or humidity control is claimed
•Sample cups during inspection (shows actual QC process)
2. Certification verification:
•Request current ISO 9001 and FSC certificates where claimed, plus food-contact compliance documentation for the exact cup and intended use.
•Verify ISO certificates through IAF CertSearch or the issuing/accrediting body, and FSC certificates through FSC Search.
•Check certificate validity, covered sites and scope; an expired certificate does not by itself establish legal non-compliance.
•Contact certification body to confirm validity (if high-value order)
3. Reference checks:
•Request 3-5 customer references (ideally in your country/region)
•Contact references, ask about defect rates, on-time delivery, communication
•Check online reviews on B2B platforms (Alibaba, Global Sources)
4. Third-party inspection:
•Hire inspection company (SGS, Bureau Veritas, Intertek)
•Inspector visits factory, verifies equipment, reviews QC processes
•Provides detailed report with photos (assessment within the commissioned inspection scope)
5. Pre-production and in-production samples:
•Pre-production: Inspect representative trial-run samples under an agreed plan before approving bulk production.
•In-production: Samples during production (monitor consistency during the run)
•Final pre-shipment: Random samples from finished goods (last quality check)
Recommendation: Consider third-party inspection according to order risk and the agreed scope; obtain an order-specific quotation.
Planning stages and lead-time factors:
Illustrative process for a 50,000-cup custom order:
Quoted lead time: Separate production readiness, freight, customs and final delivery in the order-specific schedule.
Expedited timeline (air freight + rush production):
•Factory production: Confirm whether a rush slot is available and what additional charges apply.
•Air freight: Compare quoted transit, customs and final-delivery arrangements.
Plain stock cups: Check stock availability; an existing plain design avoids custom artwork and printing-plate stages.
Red flags:
•A promised delivery date without an order-specific production and freight plan
•A production promise unsupported by a confirmed line booking, material availability and approved artwork
Planning recommendation: Allow a buffer for artwork revisions, inspection and logistics, based on the confirmed order schedule.
Capacity calculation method:
Step 1: Determine machine specifications:
•Ask supplier: “What is your production speed per machine?”
•Example: 100 cups/minute
Step 2: Calculate machine output per shift:
•Cups/minute × 60 minutes × shift hours × efficiency
•Example: 100 × 60 × 8 hours × 85% efficiency = 40,800 cups/shift per machine
Step 3: Calculate supplier’s total capacity:
•Number of machines × output per shift × shifts per day × working days
•Example: 20 machines × 40,800 × 1 shift × 22 days ≈ 17.95 million cups/month
Step 4: Assess current utilization:
•Ask: “What is your current capacity utilization?”
•Example: 17.95M × 80% utilized = 14.36M already committed
•Available capacity: 17.95M – 14.36M = 3.59M cups/month available
Step 5: Evaluate your order:
•Your order: 500,000 cups
•Supplier available capacity: 3.59M cups/month
•Your order as % of available: 500K ÷ 3,590K ≈ 13.9%
•Assessment: The order fits this illustrative capacity calculation; confirm compatible tooling and the actual production slot.
Red flags:
•An order that leaves little spare capacity for schedule changes
•Supplier cannot substantiate the machine count or operating speed used in its capacity quotation
•High utilization with no contingency for downtime or competing orders
Safe ordering: Confirm the available production slot and agree on a contingency plan for interruptions.
Common leak causes and prevention:
1. Seam failure:
Causes:
•Seam overlap below the approved design allowance
•Poor heat-seal bonding (temperature too low or short exposure)
•Seam misalignment (edges don’t contact properly)
Prevention when ordering:
•Specify: “Use the approved seam overlap and a continuous bond without gaps.”
•Contract clause: “State the seam-strength test geometry, procedure and agreed acceptance force.”
•Sample testing: Inspect representative pre-production samples using the agreed leak-test and acceptance plan.
2. Bottom seal failure:
Causes:
•Bottom disc misalignment (gaps at edges)
•Incomplete bottom sealing
•Bottom disc diameter mismatch
Prevention:
•Specify: “Inspect for gaps in the bottom seal and verify liquid resistance under the agreed test conditions.”
•Request: “Provide bottom-seal strength results with the test method and agreed acceptance criterion.”
•Inspection: Record sample seepage and apply the agreed lot-disposition procedure; do not treat a single sample check as a complete batch assessment.
3. Coating defects:
Causes:
•Pinholes in PE/PLA coating (contamination or air bubbles)
•Thin spots (uneven coating application)
•Delamination (coating peels from paperboard)
Prevention:
•Specify: “State the coating polymer and mass per coated side, plus the Cobb method, exposure time and agreed absorption limit.”
•Request: “Provide coating-adhesion results with the specimen geometry, test method and agreed acceptance limit.”
•Sample check: Inspect for exterior moisture under the cup’s specified use conditions, then investigate whether the seam, bottom or coating is responsible.
Quality agreement clause: Agree on leak-defect definitions, sampling, acceptance rules and remedies for rejected lots.
Pre-production samples: Inspect representative trial-run samples under the agreed plan before authorizing full production.
Yes, if the supplier agrees that the MOQ applies to the combined sizes:
Mixed size order example:
•Illustrative supplier MOQ: 50,000 cups in total across the approved size mix
•Your needs: 25,000 × 12oz + 25,000 × 16oz = 50,000 total (meets the MOQ if the supplier accepts this size mix)
Considerations:
Pricing:
•Different sizes/designs: Confirm plate and setup charges for each size and design.
Production:
•Machine changeover required between sizes
•Confirm how the mixed-size production schedule affects the delivery date.
Packaging:
•Cups packed separately by size (not mixed in same carton)
•Example with 1,000 cups per carton: 25,000 × 12oz in cartons 1-25, 25,000 × 16oz in cartons 26-50
Benefits:
•Reach an agreed combined-order MOQ without overordering one size
•Test multiple sizes simultaneously (determine customer preferences)
•Inventory flexibility (offer size options to customers)
Best practice: Communicate clearly: “Please confirm a mixed order of 25,000 × 12oz + 25,000 × 16oz with the same design on both sizes, including the combined MOQ, price and setup charges.”
Relevant certifications and their scope:
1. FSC (Forest Stewardship Council) or PEFC (Programme for the Endorsement of Forest Certification):
•What it means: Check the stated fibre source and chain-of-custody claim; FSC distinguishes 100%, Mix and Recycled labels.
•Why it matters: Supports the stated sourcing claim within the certification’s scope.
•Product claim: Use an FSC label only where the product and label authorization meet the applicable requirements.
•Verification: Check the organization, certificate or licence code and scope in FSC Search.
2. BPI Certified (Biodegradable Products Institute) — when making a compostability claim:
•What it means: BPI offers commercial and home compostability certification; check the exact cup’s certified scope and local collection acceptance.
•Why it matters: Supports the defined compostability claim for the certified item.
•Critical: Match the evidence and certification to the destination market’s requirements; BPI is not a globally mandatory scheme.
•Verification: BPI certification directory: match the exact cup and its commercial or home scope
3. ISO 14001 (Environmental Management System):
•What it means: The certified environmental management system covers the sites and activities listed in its scope.
•Why it matters: Provides a framework for managing environmental responsibilities.
•Scope: Management-system certification is different from product certification.
4. Carbon Footprint and Offset Claims:
•What it means: Distinguish measured production emissions, renewable-energy claims and carbon offsets.
•Why it matters: An offset claim alone does not prove a lower overall product footprint.
•Verification: Request the accounting scope, reporting period and supporting records for the specific claim.
Warning about greenwashing:
•Broad “eco-friendly” claims need specific substantiation; a certificate alone does not verify every implied benefit.
•“Biodegradable” claims depend on the whole cup and disposal conditions; PLA alone proves neither home nor commercial compostability.
•Check supporting evidence and verify any claimed certificate with its issuer.
Credible environmental claims: Match each claim to the exact product, evidence, certification scope and available disposal route.
Get Started:
•Get pricing quote with detailed specifications
Manufacturing quality becomes commercially useful only when it is tied back to format, coating choice, thermal performance, and lid compatibility. These pages connect production detail with the buying decisions operators actually make.